TelcoBridges
xDR files
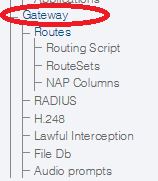
In order to set up xDR files integration, you need to go to the Gateway section in the navigation panel.
It will lead you to the Configuration settings, where you need to set the following options:
- Use CDR behavior – enable checkbox
- Reverse CDR call origin – enable checkbox (for version 2.7 or higher)
- CDR Mode – set to "Text CDR only"
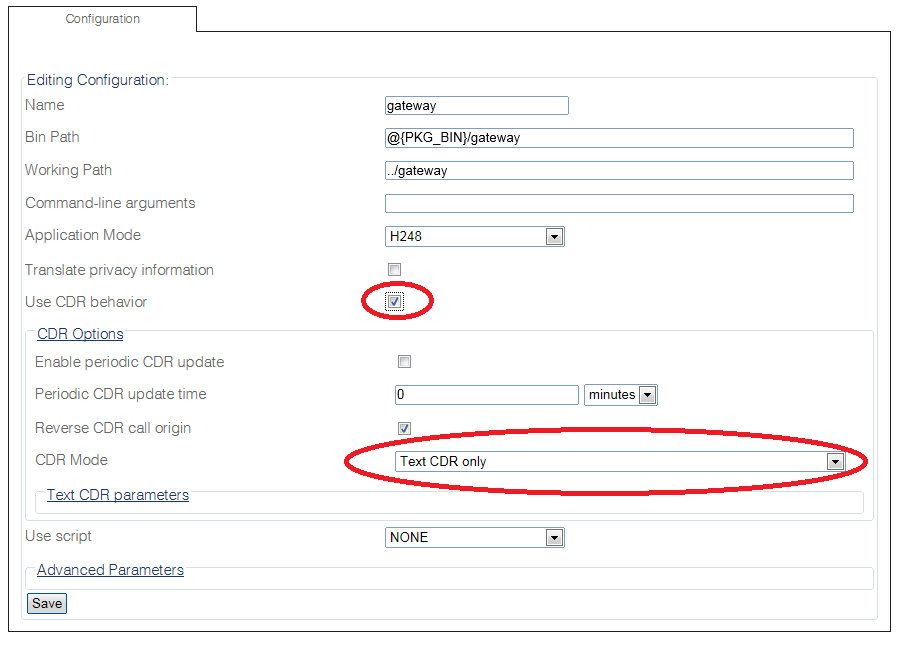
Once finished, click Save to save your changes.
For more detailed instructions, please refer to the Telcobridges documentation portal.
RADIUS
In order to set up RADIUS integration (any type of), you need to complete RADIUS client configuration and RADIUS servers configuration first.
Client configuration
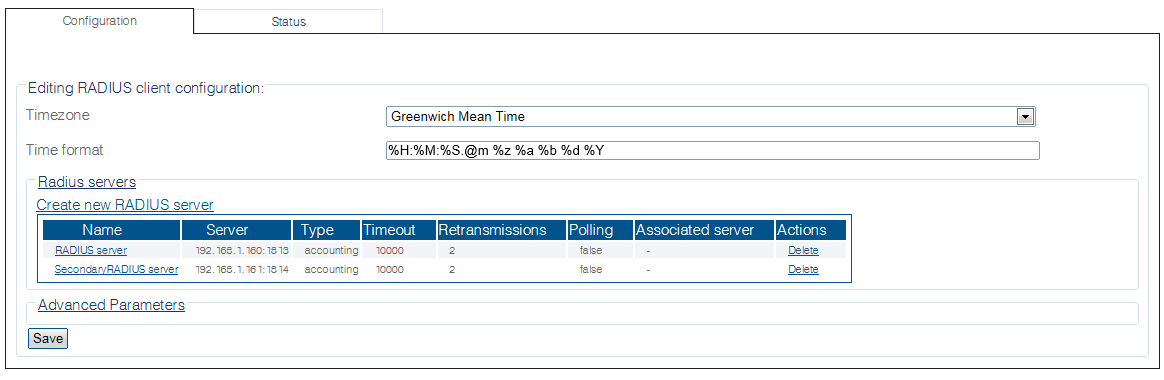
RADIUS client configuration is the first step in order to set up RADIUS integration. Go to the RADIUS section in the navigation panel and configure the following parameters:
| Field | Description |
|---|---|
| Timezone | Timezone to use for all timestamps, set to "Greenwich Mean Time" |
| Time format | Format for timestamps, set to %Y-%m-%dT%H:%M:%S.%f%z |
| Advanced Parameters | |
| Maximum accounting concurrent records | The maximum number of the simultaneous accounting records to be sent. The setting allows to control the load put onto the RADIUS server. Default value is 10 records. |
| Maximum accounting queued records | The maximum number of the accounting requests to queue when the maximum number of pending requests is reached. Default value is 12000 requests. |
| Maximum authorization concurrent requests | The maximum number of the simultaneous authorization requests to be sent. Default value is 200 requests. |
| Maximum authorization queued requests | The maximum number of the authorization requests to queue when the maximum number of pending requests is reached. Default value is 12000 requests. |
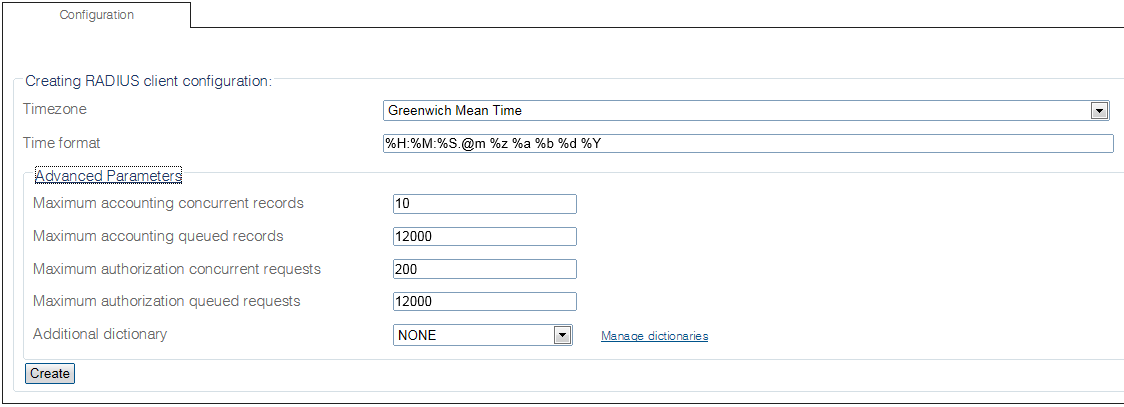
After configuration click "Create" and make sure the "RADIUS client configuration successfully created" message is displayed.
Adding RADIUS server
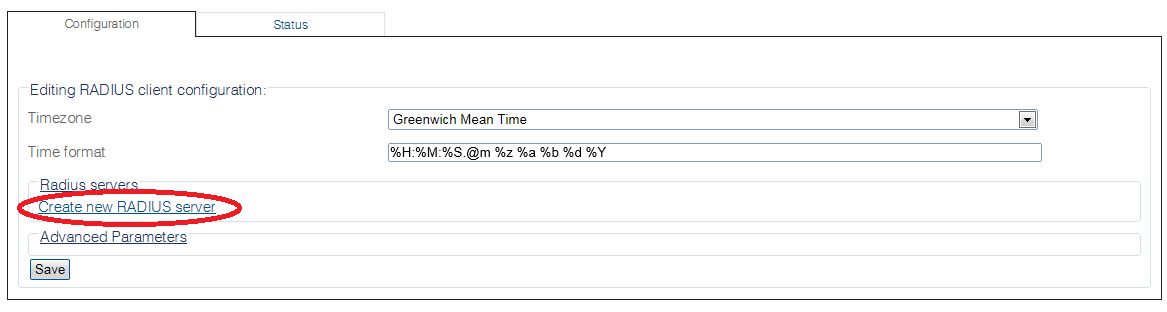
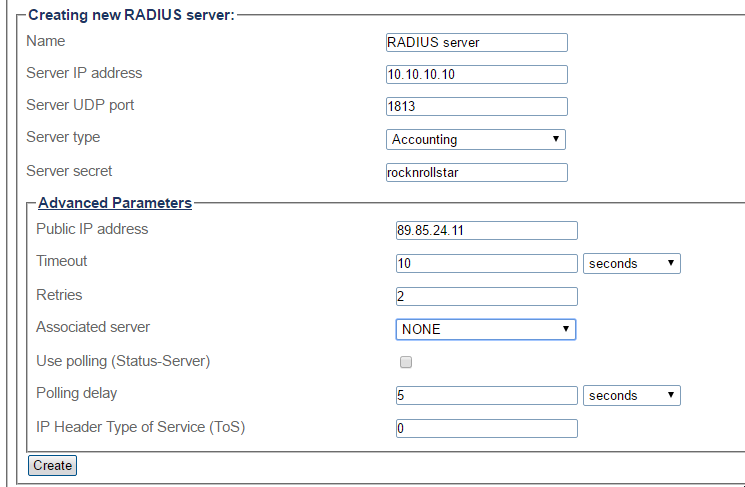
After creation of the RADIUS client, you need to add the RADIUS servers. To do that, go back to edit RADIUS client configuration. On the edit page click "Create new RADIUS server" (see screenshot below).
Configure parameters according to the suggestion below:
| Field | Description |
|---|---|
| Name | Set to "JeraSoft RADIUS" |
| Server IP Address | Set to the IP of the JeraSoft Billing |
| Server UDP Port | Set to 1812 for authorization and 1813 for accounting |
| Server Type | Select type of the server you need |
| Server Secret | Set to random value (same as in the JeraSoft Billing) |
| Public IP Address | Telcobridges address to use if it is behind a NAT |
| Timeout | Request timeout, set to 10 seconds |
| Retries | Number of retries to do, set to 2 |
| Associated Server | In case of failure, requests will be sent to this server |
| Use Polling (Status Server) | Keep disabled |
| Polling Delay | Non relevant |
| IP Header Type of Service (ToS) | ToS to use in the IP header of RTP packets, set to 0 |
You can configure multiple RADIUS servers to provide redundancy protection for RADIUS servers. Each entry can have different settings.
Accounting
In order to enable RADIUS accounting, you need to go to the Gateway section in the navigation panel. It will lead you to the Configuration settings, where you need to set the following options:
- Use CDR behavior – make sure it is enabled
- Reverse CDR call origin – enable checkbox (for version 2.7 or higher)
- CDR Mode – select one of the following depending on your requirements:
- Text CDR only – write CDRs to files only, RADIUS is disabled
- RADIUS CDR only – send RADIUS accounting only
- Text and RADIUS CDR – send RADIUS accounting and write to CDR files
- RADIUS CDR with Text CDR Fallback – send RADIUS accounting and if the RADIUS server cannot handle the load of CDRs, they will be stored in a file
Once finished, click Save to save your changes.
External routing
In order to set up external routing you need to add a relevant routing script. To do so, please follow these steps:
-
Select "Routing Script" in the navigation panel
-
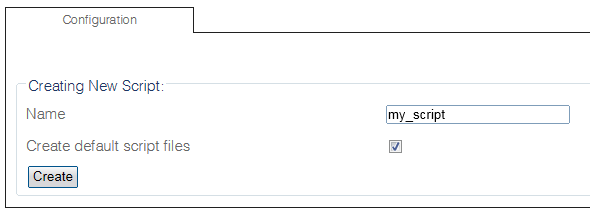
Create a new routing script
- Name – `jerasoft-routing``
- Create default script files – enable checkbox
-
Click "Create" and wait till "Script was successfully updated" message appears
-
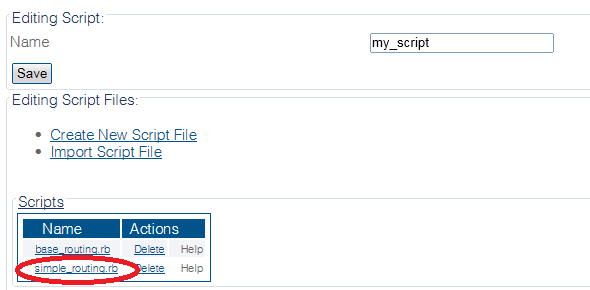
Disable
simple_routing.rb-
Click on the script name
-
In the edit form uncheck "Load on startup"
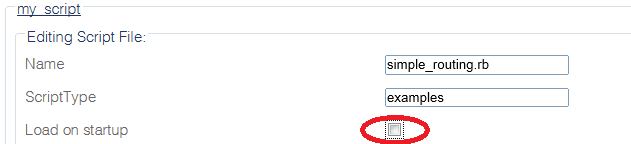
-
-
Replace
base_routing.rb- Click on the script name
- Import script from radius_authorization_jerasoft.rb
-
Enable usage of the routing script
- Click "Gateway" in the navigation panel
- Select the script you wish to use (
radius_authorization_jerasoft.rb) in "Use script" - Save settings